Google Tag Manager: Effective tracking and analysis
06 min
eologyeo:magazineGoogle Tag Manager: Effective tracking and analysis
Google Tag Manager is a powerful tool that makes it much easier for website owners to implement and manage tracking codes and marketing tags. In this article, you’ll learn how Google Tag Manager works, what benefits it offers and how you can successfully set it up on your website.
What is Google Tag Manager?
Google Tag Manager allows website owners to easily implement andmanagetracking codes, such as Google Analytics, conversion tracking tags and other marketing tags, without having to change the source code of their pages.
Is Google Tag Manager free of charge?
Basically, Google Tag Manager is free of charge. However, there are advanced features and support options for which there is a cost. For example, Google offers Google Tag Manager 360 for larger companies that want everything. Compared to the free version, the Google Tag Manager 360 offers an unlimited number of workspaces for simultaneously performed tag identifications. Also, in addition to the possibility of approval workflows, this possesses zones for extensive implementations for controlled access to tag identifiers.
What are the advantages of Google Tag Manager?
Google Tag Manager is a powerful tool that offers numerous benefits to website owners and marketers.
A key benefit of Google Tag Manager is that it greatly simplifies the implementation and management of various tracking codes and marketing tags, as changes can be made centrally through the Tag Manager dashboard without requiring any direct changes to the site’s source code.
Here are some of the key benefits of Google’s Tag Manager:
Ease of implementation: the Google Tag Manager should be included in a central location in the source code. Thus, it is usually implemented in the header area. Flexibility and control: Google Tag Manager allows you to quickly and easily add or remove tags as needed, as well as update them without requiring technical expertise. This gives you full control over your tracking and marketing tags. Fast deployment: Centralized management of tags means that changes and updates can be implemented immediately on the website in real time. This means that marketing campaigns or tracking requests can be implemented quickly without having to wait for IT to develop them. Error prevention: Due to the fact that tag code is centrally managed in Google Tag Manager, errors that can occur when tags are implemented manually can be avoided. In addition, you can review and test tags before publishing to make sure they work properly. Better user experience: By using Google Tag Manager, you can improve the load time of your pages. Since all tags are loaded asynchronously, they can’t affect pagespeed, resulting in a better user experience. Data collection and analysis: Google Tag Manager facilitates integration with other Google tools such as Google Analytics. Through the use of tags, extensive data can be collected about user behavior and website performance, which is crucial for website analysis and optimization. Overall, Google Tag Manager provides an efficient and flexible way to manage and implement tags on websites. It allows you to stay in control of your tracking and marketing tags while improving the efficiency and performance of your websites.
What features does Google Tag Manager offer?
In the field of online marketing, Google Tag Manager (GTM) allows you to manage tracking codes and other scripts on your websites. GTM simplifies the implementation and management of analytics and marketing tags, resulting in more efficient and flexible website tracking management. Below are some of the main features of Google Tag Manager.
Tag Management: GTM allows you to manage various tags in one centralized location. Tags are code snippets that are used for various tracking and analytics purposes, such as Google Analytics, Facebook Pixel, conversion tracking, and more. With GTM, you can add, edit, and remove tags without having to change the website code. Rules and Triggers: GTM allows you to set up various rules and triggers to determine when and where tags should be loaded on your website. This provides granular control over tag tracking and execution. For example, you can create triggers that specify that a particular tag is only loaded when a user clicks on a particular button or visits a particular page. Version control: GTM provides you with version control that allows you to track changes to your tags and trigger rules. This allows you to easily switch between different versions to return to a previous state or review changes. Preview and debugging mode: GTM’s preview and debugging mode allows you to test your changes before publishing. You can preview the updated tags and check if they work as expected. This helps identify potential errors and ensure that the tags are running properly. Integration with other Google products: GTM is seamlessly integrated with other Google products, such as Google Analytics and Google Ads. This allows users to better manage and optimize their tracking and marketing campaigns.
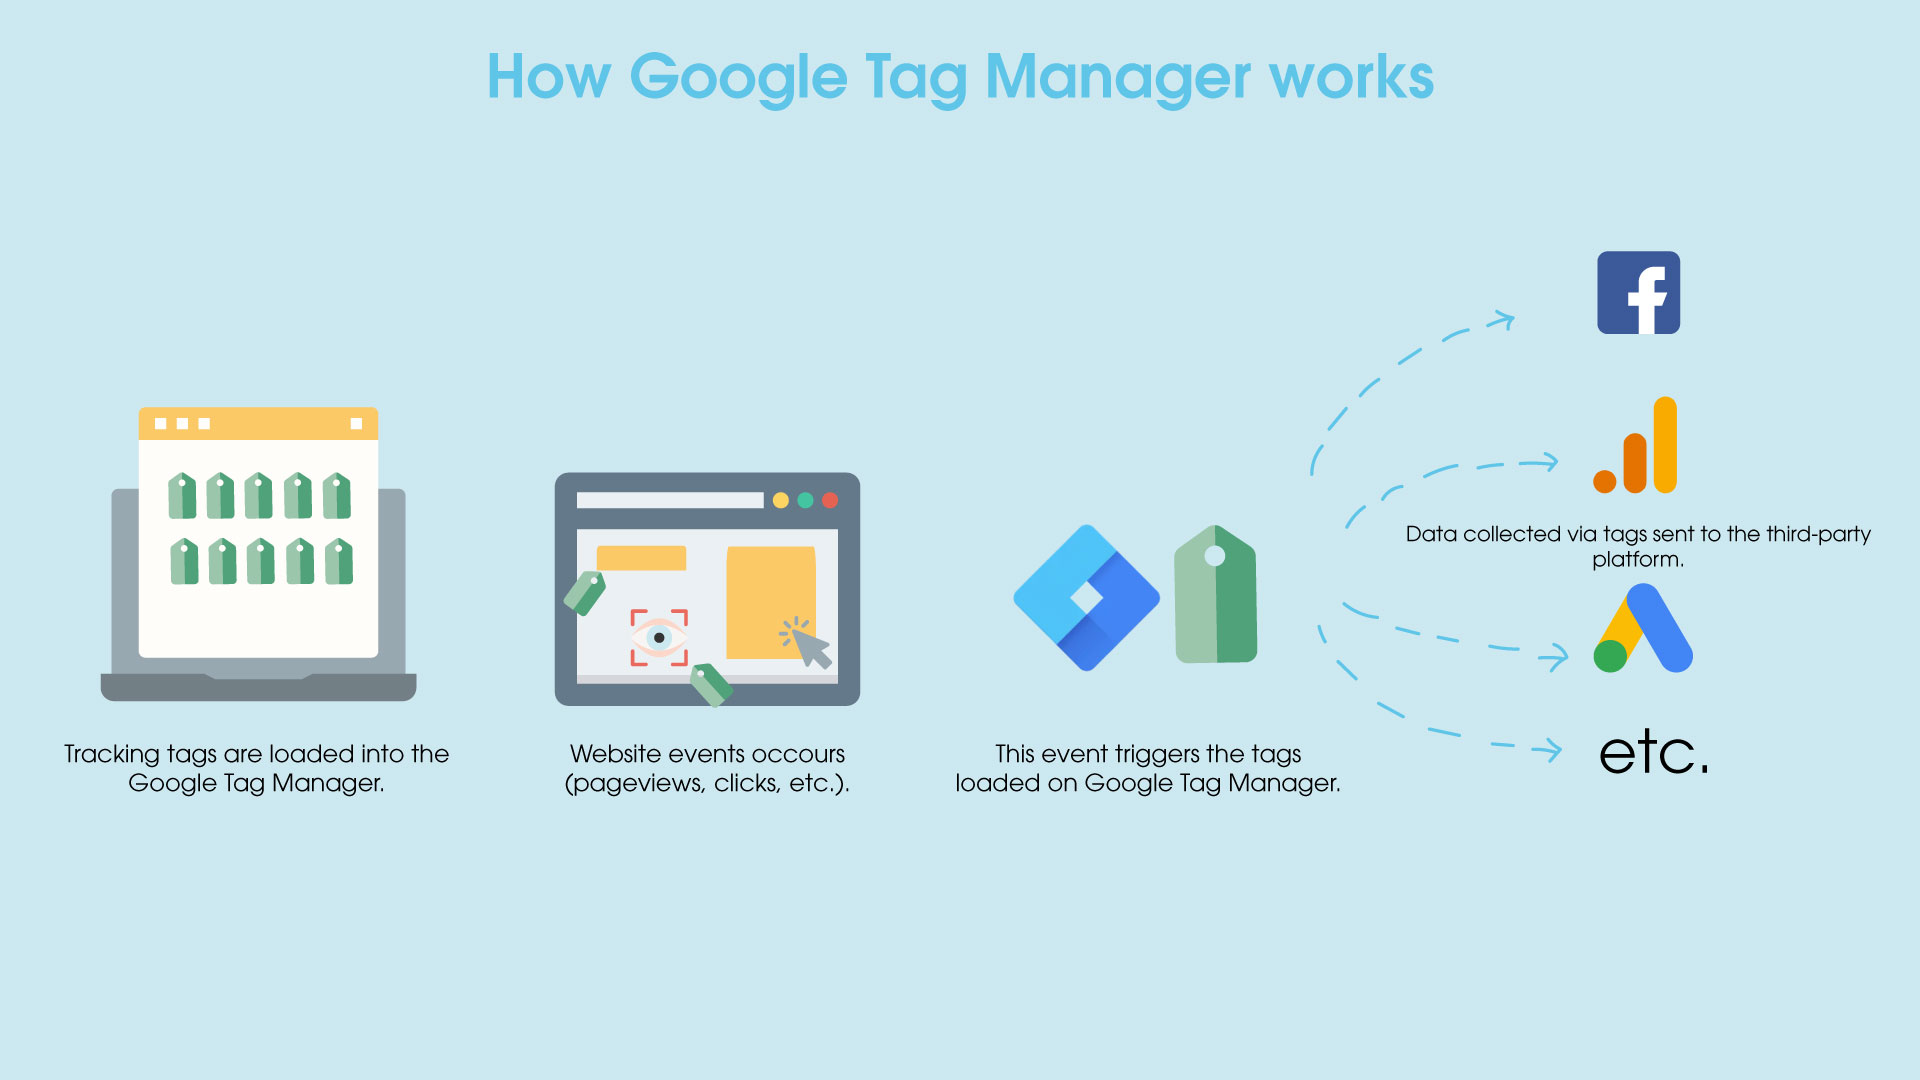
Figure 1: How Google Tag Manager works
In summary, Google Tag Manager provides a user-friendly solution for managing website tags and tracking data. It simplifies the implementation and management of tracking codes, improves efficiency, and provides granular control over tracking. With GTM, website owners can better understand their visitors’ behavior and optimize their marketing efforts to achieve better results.
How do I set up Google Tag Manager on my website?
Setting up Google Tag Manager on your website is an important step to make tracking and tag management efficient. For this, we have prepared a step-by-step guide for you.
How do I set up the Google Tag Manager in WordPress?
Setting up Google Tag Manager in a content management system like WordPress can be done in different ways. Here is a guide that can help you set up Google Tag Manager successfully.
Create account: Go to the Google Tag Manager website and create yourself a new account if you don’t already have one. Create container: After you have created an account, you can already create a container. A container is a place where all your tags, such as tracking codes or scripts, will be stored. Copy container snippet: Once you create a container, you will get a container snippet. Open WordPress Website: Log into the administration panel of your WordPress website. Install Google Tag Manager plugin: Go to the plugin section to add Google Tag Managers and search for the “Google Tag Manager” plugin. Install and activate it. Plugin configuration: go to the “Google Tag Manager” plugin section and click “Settings”. Paste the container snippet code you copied earlier into the field provided. Verify container: After you have pasted the code, you can verify the container to make sure everything is working properly. To do this, go back to Google Tag Manager and click on “Verify Container”. Check if the verification was successful. Add tags: Go back to the Google Tag Manager and click on “Add tags”. Select the desired tag type (e.g. Google Analytics, Facebook Pixel, etc.) and configure it according to the instructions of the corresponding service. Publish: After you’ve added and configured your tags, click “Submit” or “Publish” to save the changes in Google Tag Manager. Review: Go to the website to verify that the tags are working properly. For example, use your browser’s developer tool for this to check if the tags are loading.
This is a basic guide to setting up Google Tag Manager in WordPress. However, note that some steps may differ depending on your plugin or individual requirements. Always make sure you follow the actual instructions of the plugin and services you want to integrate.
How do I set up Google Tag Manger in Shopify?
Setting up Google Tag Manager into a content management system like Shopify can be done in a number of ways. Here is a guide that can help you set up Google Tag Manager successfully.
Create GTM account: Create a Google Tag Manager account. Go to the Google Tag Manager website and create an account if you don’t already have one. Follow the instructions to set up your account. Create container: after creating your GTM account, create a new container for your Shopify store. Enter a name for the container and select the correct destination country. Copy the GTM container code: In the next step, you will be shown the GTM container code. Copy the code that you will later paste into your Shopify store. Go to Shopify and log in: Open a new tab and go to the Shopify website. Log in with your credentials and go to the Shopify admin area. Go to the theme section: in the Shopify admin section, click on “Online Store” and then select “Themes”. Click on “Actions” and select “Edit code”. Paste GTM code: In your theme’s files, search for the “theme.liquid” file and click on it to open it. Scroll down and look for the tag. Paste the GTM container code you copied earlier directly above the tag. Save, review changes: After you have pasted the GTM code, click “Save” and then “Back” in the upper left corner. Verify that the changes were saved correctly by going to your Shopify store and refreshing the page. Configure tags and triggers in GTM: Return to Google Tag Manager and configure your tags and triggers according to your needs. For example, you can add tags for Google Analytics, Facebook Pixel or other marketing tracking codes. Publish the GTM container: Once you have configured your tags and triggers, click “Submit” in GTM to publish the container.
After you complete these steps, Google Tag Manager is set up in your Shopify store. Make sure you check your tags and triggers in GTM to make sure all the tracking codes you want have been implemented properly.
Is the Google Tag Manager compliant with the GDPR?
Google Tag Manager (GTM) itself is in itself a website tag management tool and is not specifically designed to meet DSGVO requirements. However, it is possible to use GTM in compliance with the GDPR by taking appropriate measures.
In order to use the GTM in a DSGVO compliant manner, you must ensure that third-party tag integrations are in compliance with your country’s data protection regulations. This includes using privacy-friendly settings and obtaining the necessary consents from users, if required.
In addition, the website’s privacy policy should clarify what types of data are collected and how they are used. It is important to respect users’ privacy and ensure that their personal data is adequately protected.
Looker Studio is an evaluation and data aggregation tool from Google that makes it possible to combine different data sources and visualise them with the help of visualisations. Find out here how you can use it for your company. ... Continue readingGoogle Looker Studio: A guide to data-driven visualisations